In less than 6 months, on July 1, 2023, Google will sunset its popular and familiar Universal analytics known as GA3.
This means that by July 1, 2023, Google will stop collating data for universal analytics.
Therefore, it is crucial that as marketers and as a business, you migrate to the new version of Google Analytics to retain valuable data.
Google Analytics 4 or GA4, is more than just an upgrade of the current Universal analytics. While Google Analytics 3 was good, it was limited on how it measures analytics data. And that is what GA4 was designed to fix.
GA4 is a whole new way of collecting and measuring analytic data from web and app properties.
In this guide, I will walk you through setting up Google Analytics 4 step by step so you can use it to gain valuable insights into your website’s performance. This guide is perfect for you if you are setting up GA4 for the first time or you want to check your GA4 tag implementation to be sure you are doing it correctly.
What is Different About Google Analytics 4
Google Analytics 4 is different from universal analytics. Here are some of the top differences:
- A different reporting interface
- A new measurement modeling. Everything is an event
- No more view setting. Instead, GA4 uses data streams.
- Goals are now replaced with events. No more setting up goals. In GA4, you need to set up an event and then decide if you want it to be a conversion event or not.
- No bounce rate. We now have an Engagement Rate.
- Easily customizable. You can create custom events and reports.
Prerequisites for Installing GA4
If you are installing GA4 for the first step, here are the basic prerequistes:
- Have access to a Google Analytics account
- Website or app to track
- Proper permissions to make changes to the website or app
How to Setup Google Analytics 4 Tracking
Ready to setup GA4?
Here is a breakdown of the step-by-step guide on how you can set up your Google Analytics 4 (GA4) correctly.
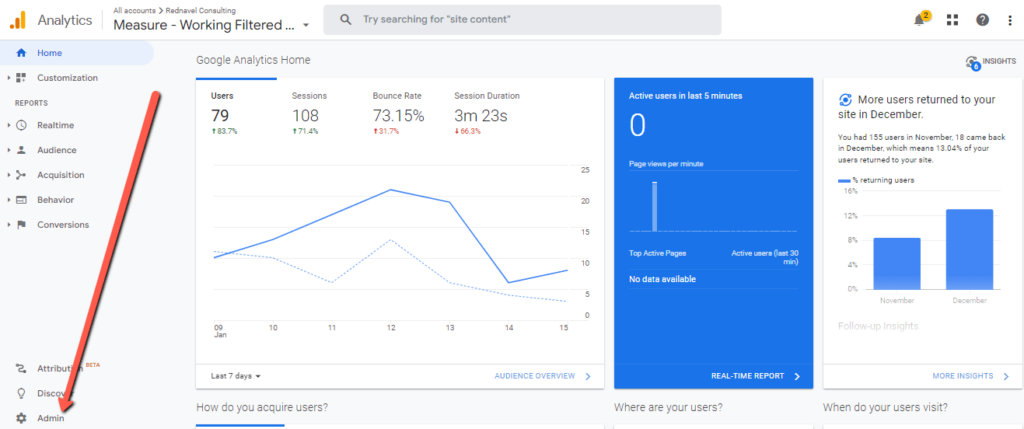
1: Launch Google Analytics
2: Click Admin
3: Click Create Property to create a new account
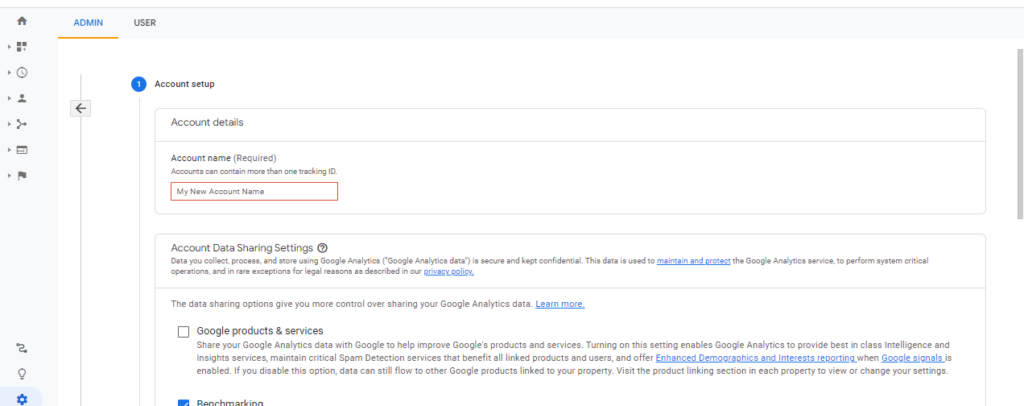
4: This will take you to the account setup page.

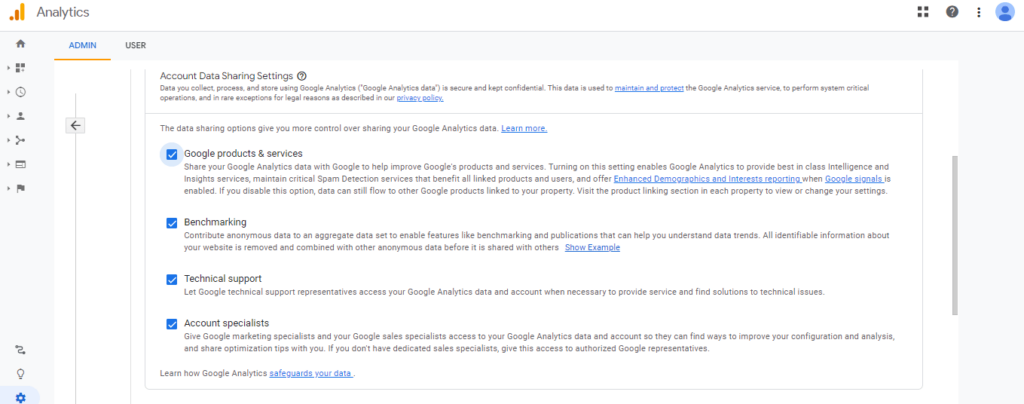
Here you want to enter the account name, usually the name of the brand/company.
Optional: You may want to check all options under the Data Sharing Setting. This lets you get a notice when information or update comes out, and not only for marketing messages alone.
5: Click Next to go to the Property Setup Page
6: On the property page, fill in the website name and change the reporting time.
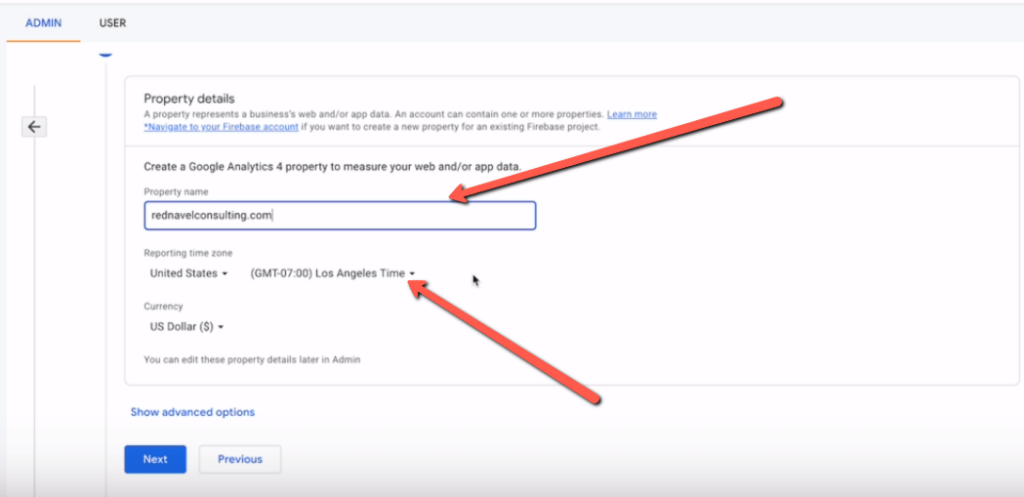
Hint: Always change the reporting time to the country where your website server is located.
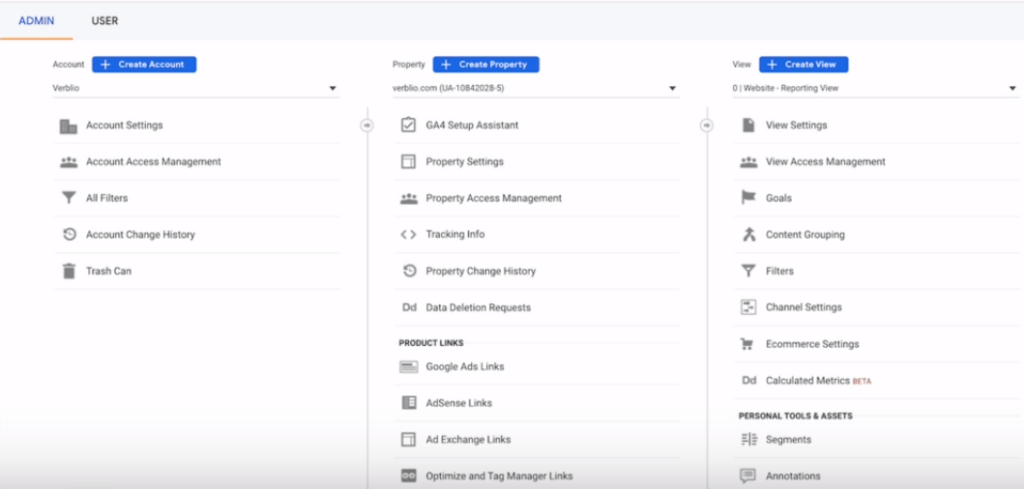
Note: Major difference between GA4 and GU3 is that in GA4, the view setting no longer exists
Below is an image of Universal Analytics settings: Note the 3-column dimension
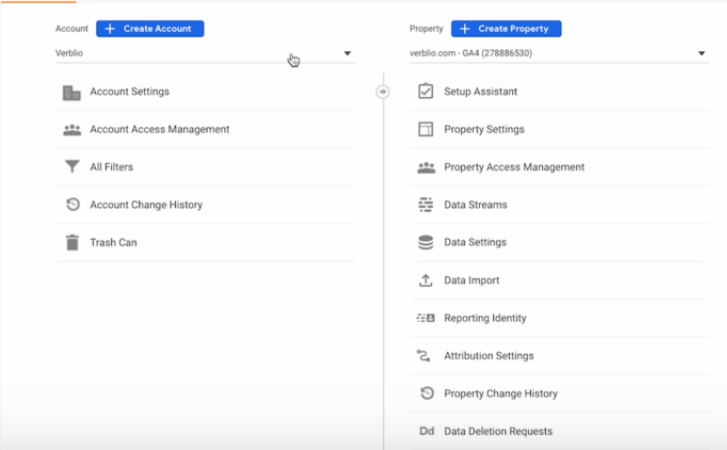
In GA4 setting, note the two-column setting.
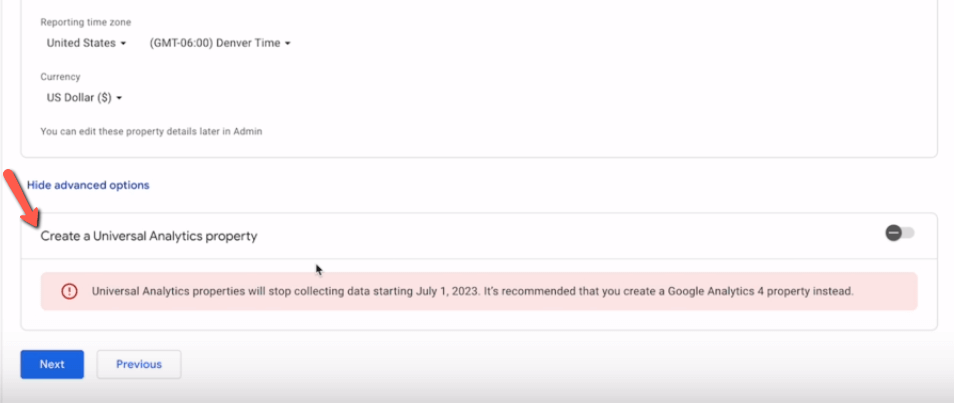
7: Click Show Advanced Options

Do this if you want to set up Universal Analytics. This step is optional and not recommended since UA is being phased out.
Click Next
8: Configure Parameter setting for your website: This includes choosing your category, business size, and core goal for the website.
Recommended options are:
- Measure customer engagement with my site or app
- Measure data across multiple devices or platforms
- Increase my conversions
- Measure content monetization
- Measure lead generation
9: Accept Policy Statement and Processing
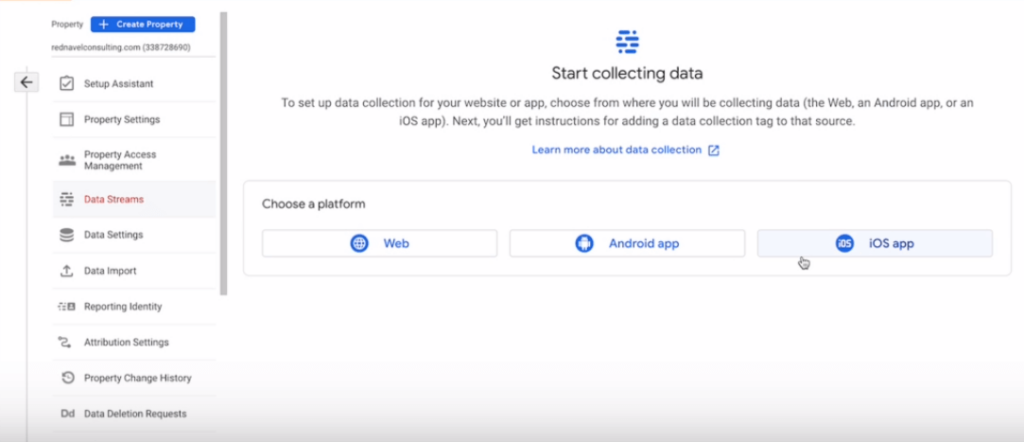
10: Next, click on Data Stream
Depeneding on what you are setting up analytics for, you can choose from the following options, Web, Andriod App, IOS App. . In our case, we will select “Web”
11: Setup the data stream
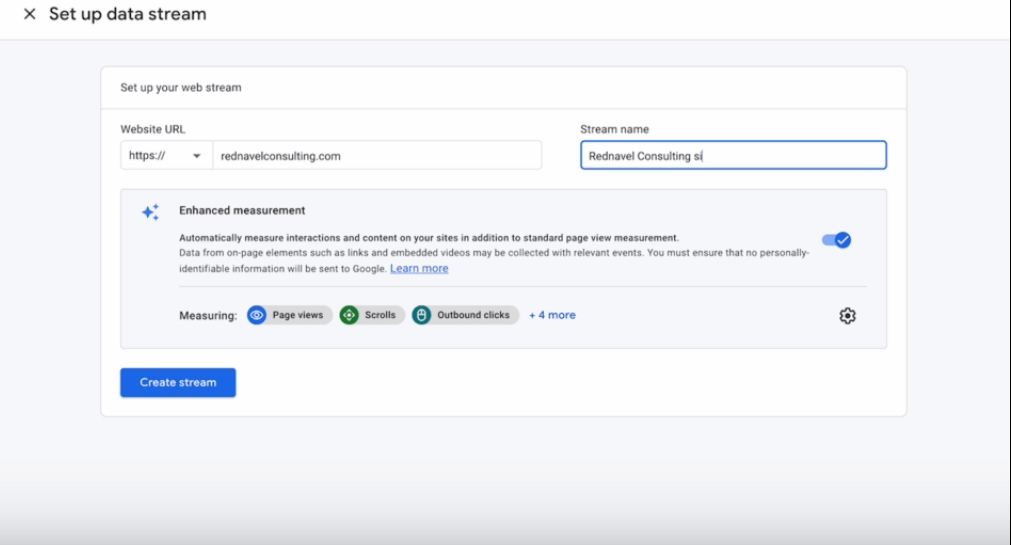
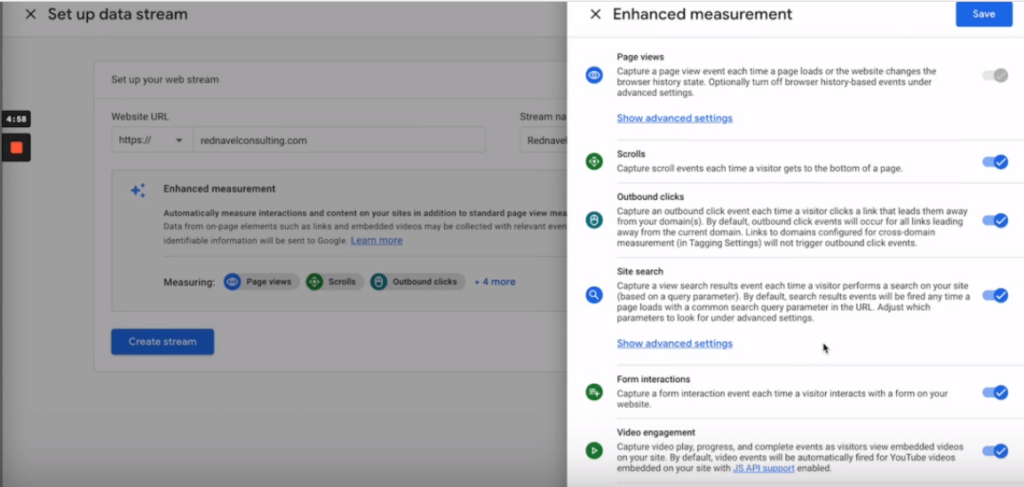
12: Click on the Enhanced Measurement to open up the enhanced measurement setting.
We won’t be using any of the settings here as we will want to manage it through Google Tag Manager. Therefore it is safe to turn everything off here
13: Click Create Stream
14: Now that you have your GA4 analytics setup, we need to add it to the site. However, we will be doing that through Google Tag Manager as this is the best way to implement marketing and analytics tag on your website.
15: Open up Google Tag Manager
Here is the first screen you will see.
16: Click Create Account
17: Setup your account by:
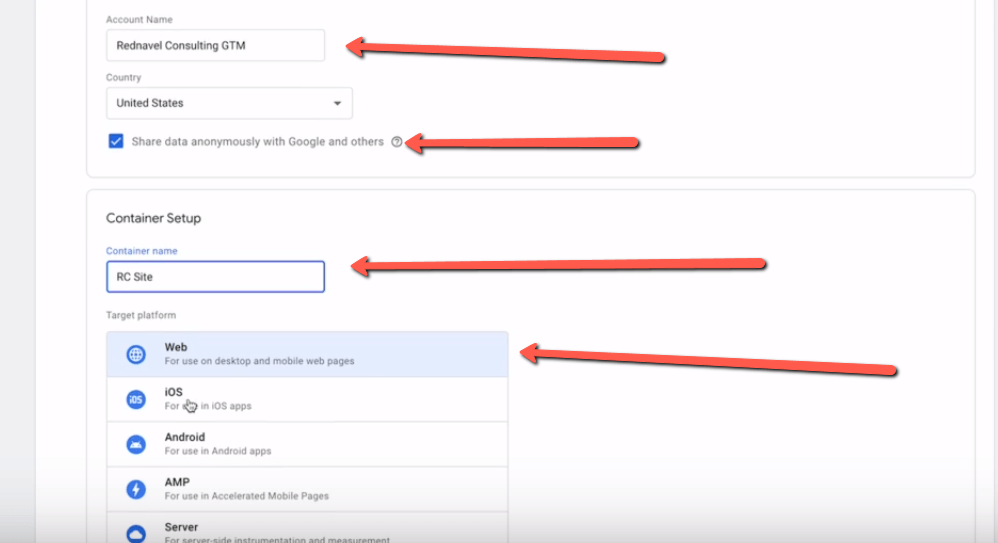
- Enter account name:
- Check the button
- Enter a container name
- Pick the property you want to measure eg, web
- Click Create
18: Accept the policy statement and processing
19: You will get a code to install on your site. Send the code to your developer, but if you are tech-savvy, you can install it yourself, especially if your CMS is WordPress. There are tons of plugins that support this functionality.

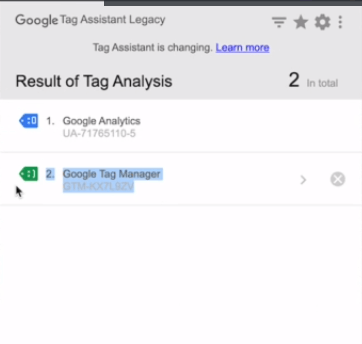
20: To confirm if it is properly configured, install the Google Tag Assistant Chrome extension and launch it. Copy the code and confirm if it is the same as what is on Google Tag Manager.
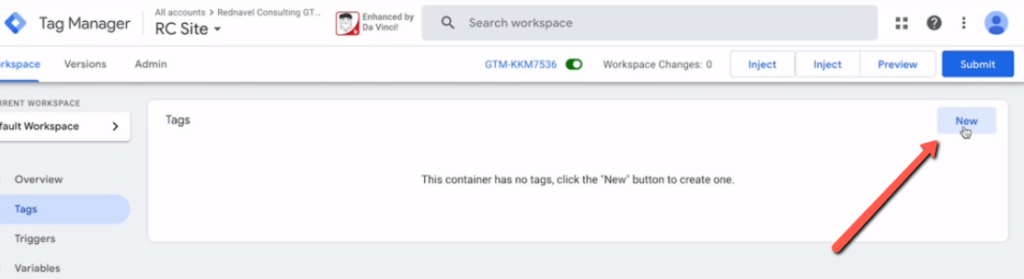
21: Click Tag
22: Click “New” to add a new tag
23: Click the choose tag option to launch the tag configuration setting.

24: The first tag you want to set up is the configuration tag. After that, all other tags we will be setting up will be “Event tag type”
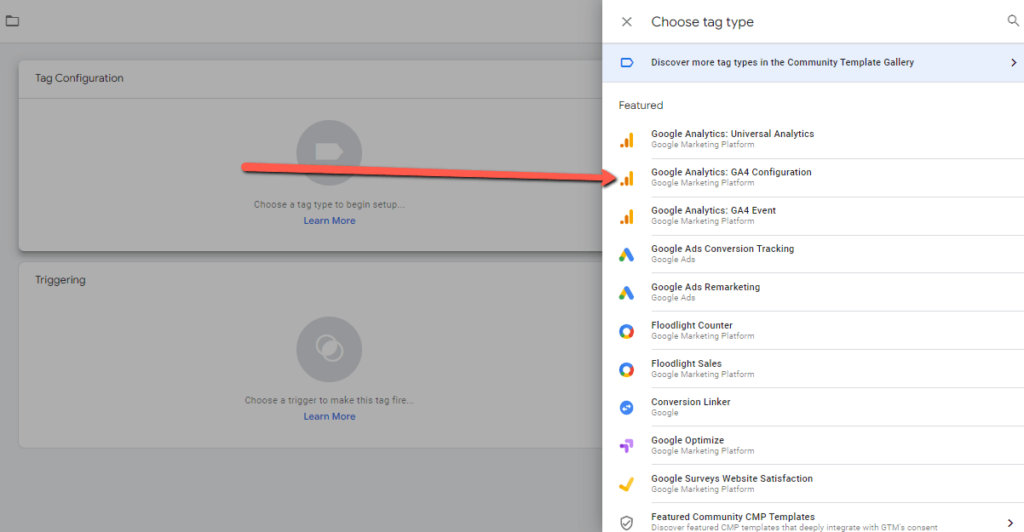
Choose Google Analytics: GA4 configuration
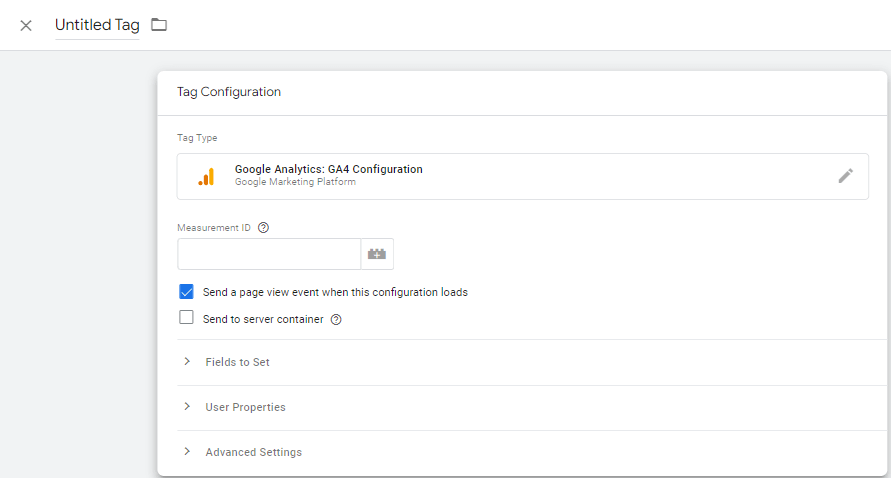
25: Copy your measurement ID and add it. Make sure that the “Send a page view event when this configuration loads” is ticked.
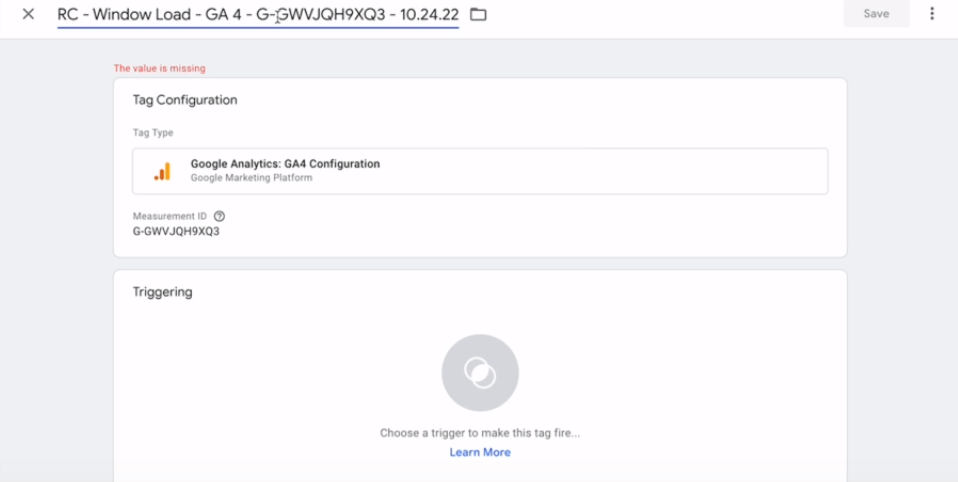
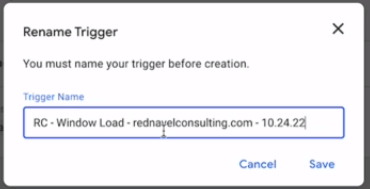
26: Name your tag.
We recommend using the following naming convention.
Name – Tag Function – GA4- Configuration ID – Date
27: Click on the Trigger section to tell GTM when to fire the tag.
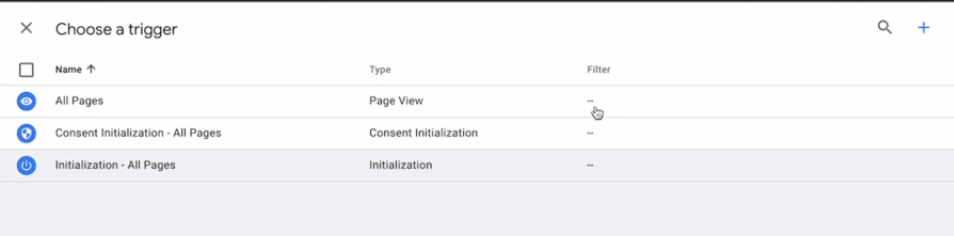
28: Set the tag to fire on Window load.

29: Pick the window load option.

30: Click to expand some Window Loaded Events.
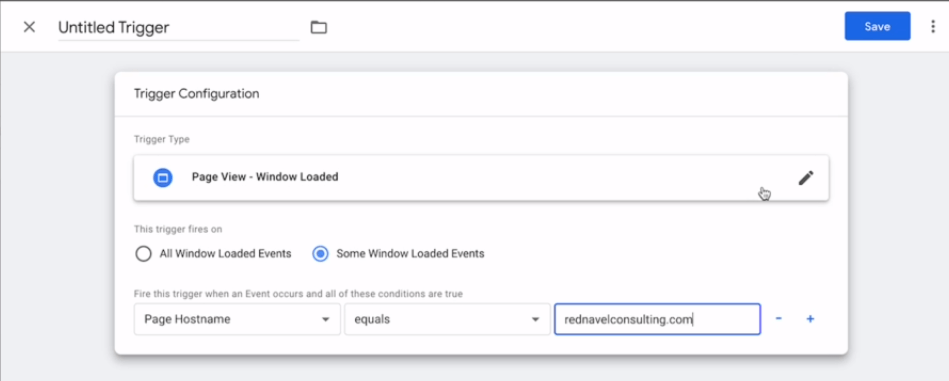
Fill in the options. We want this event to fire when the page hostname equals “name of site”.
31: Name your tag using the recommended naming convention.
Click Save.
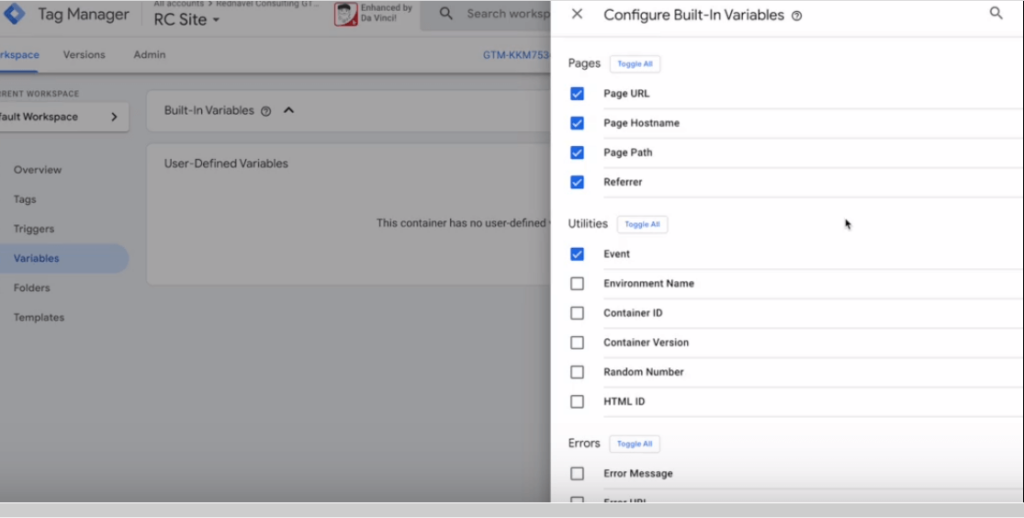
The next thing we want to do is turn on some variables.
So Click on Variable from the left-hand side navigation menu
Click Configure
32: Click on Toggle All to turn everything on because we will be using them later
Next we want to create a test workspace. This is optional but it is good as you will be using this to test some of your tag configuration before deploying to the main container.
33: Click on the default workspace already created
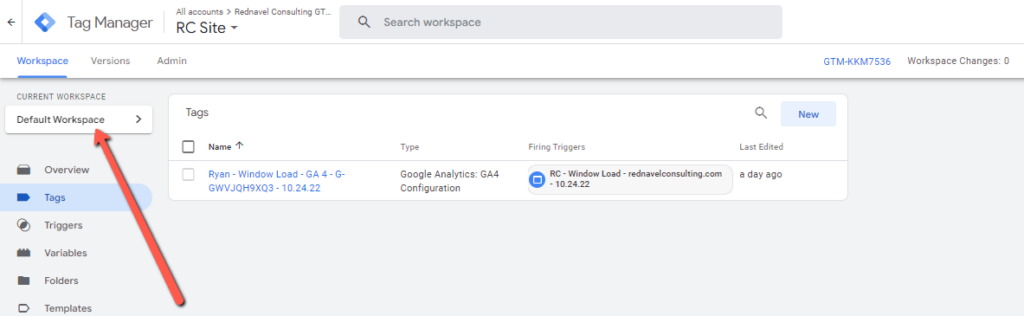
34: Click the + plus sign to add new workspace.
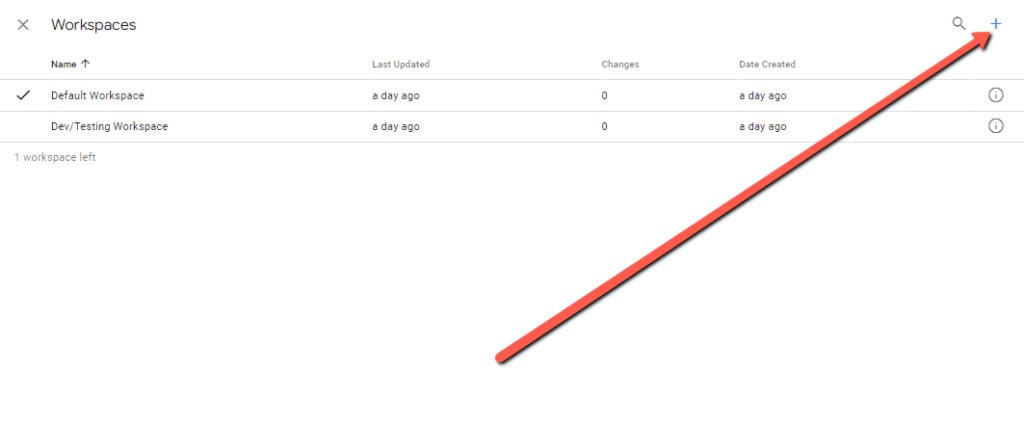
35: Give your workspace a name eg, Test, Dev
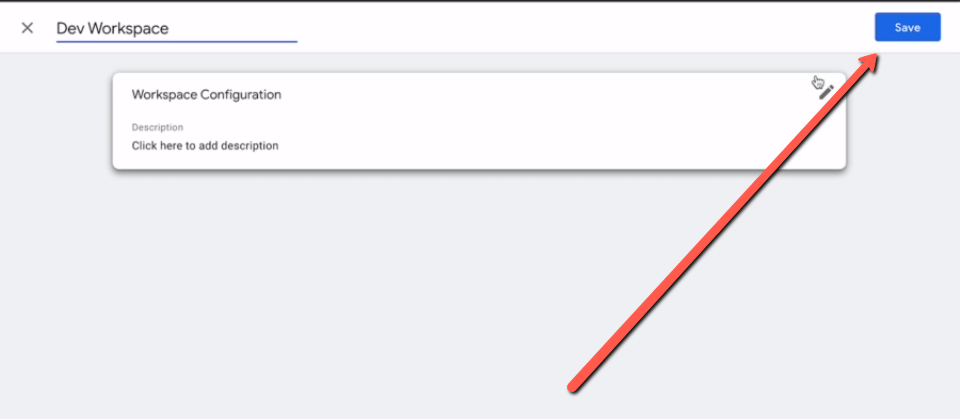
Click Save
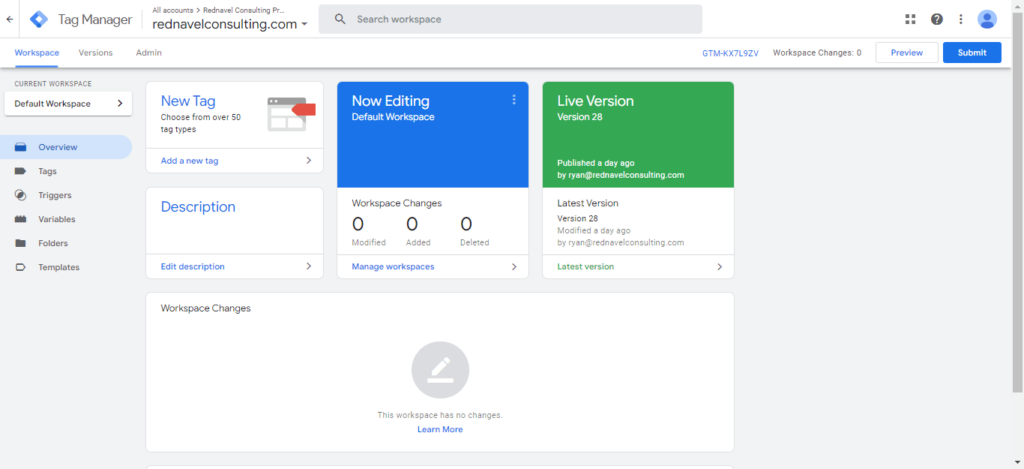
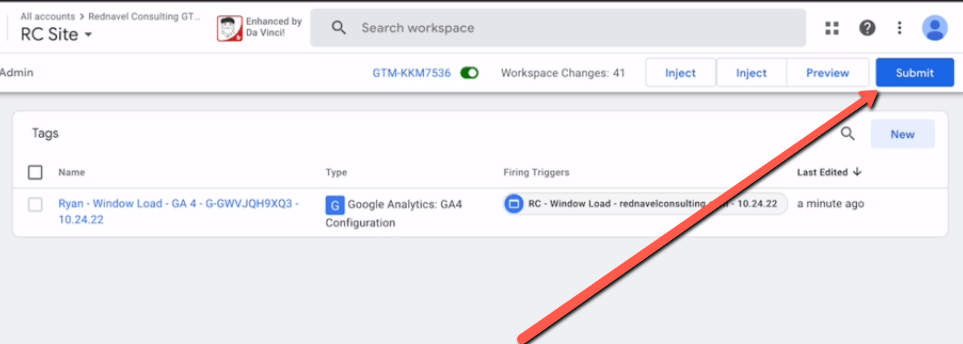
36: Click Submit
37: Click Publish
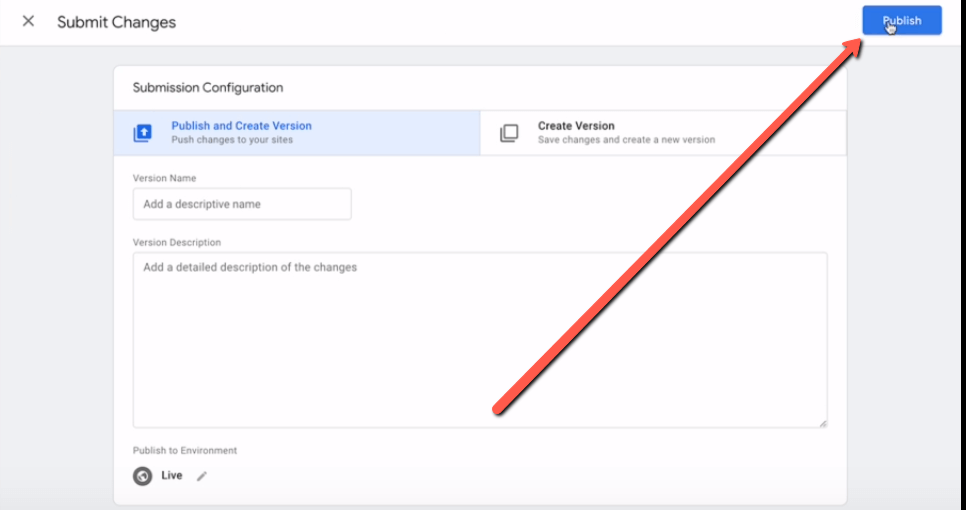
38: Give your version a descriptive name
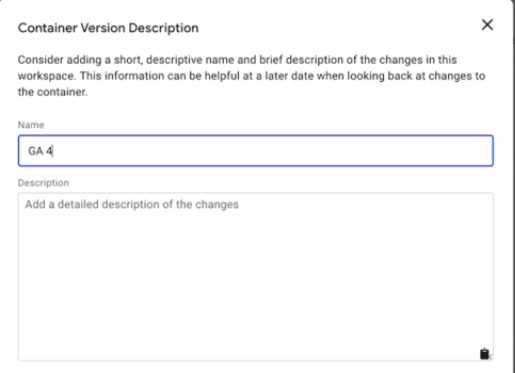
Click Save and Publish your tag.
Conclusion:
Google Analytics 4 can feel intimidating at first but by following the step above, you can successful setup GA4 correctly to get valuable insight for your business. With GA4, you can better understand your audience and make important data-driven decisions to improve your marketing.